01 Open up the file from where we left working on the cardboard box. Select a single side of the cardboard box while deleting rest of the sides. Turn on the 'Percent Snap Toggle' and uniformly scale it up to '1000 %'. Hit 'J' on the keyboard in order to get rid of the 'Bounding Box' that appears on every selected object.
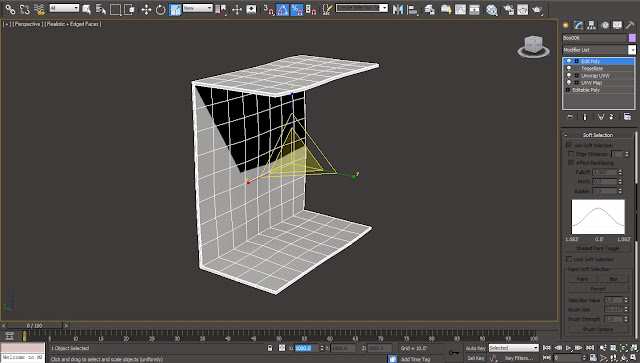
02 Get rid of the 'Edit Poly' modifier from the top of modifier stack before rigging the cardboard box. Switch to 'Systems' panel from the 'Create' menu in order to access the 'Bones' tool. Bring up the 'Left View-port' and start creating a basic bone rig following the structure of the cardboard box creating one bone for each side. Hit right click once we are done creating the bones. We will end up with an extra bone tip at the end our bone setup.
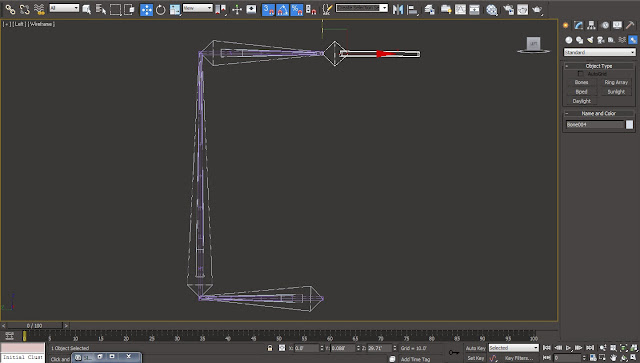
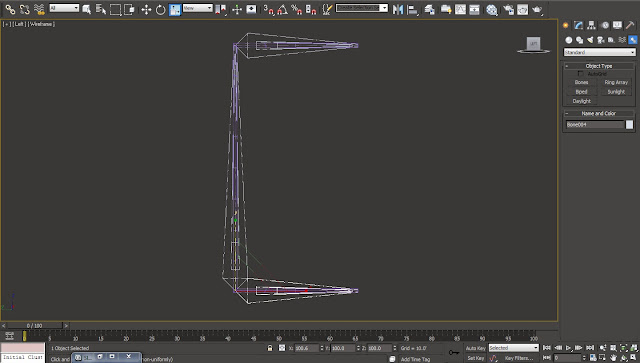
03 Just select and delete this bone tip in order to get rid of it. Right now the 'Parent Bone' is 'Bone001' which is representing the flap are of the box. But as we need both the flaps of the cardboard box to be the child of the side, we have to get rid of the current parent bone (Bone001) and replace it with a copy of the flap bone at the top.
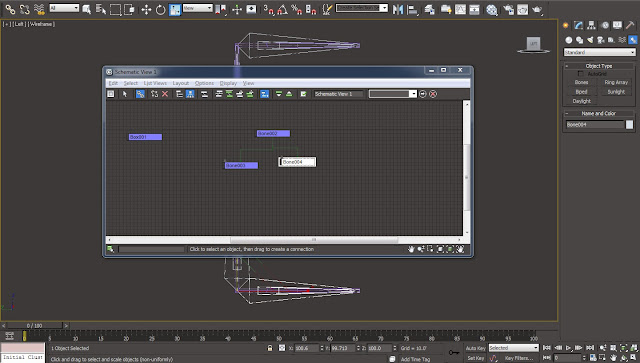
04 Now in order to make the bones of the flap to be the child of the side bone we have to connect both the flap-bones into the side-bone inside the schematic view. Schematic view can be accessed through the 'Graph Editors' menu and by selecting 'New Schematic View'. Connect 'Bone004' with 'Bone002' by the help of connect tool that can be found as the third icon in the 'Schematic View' toolbar.
05 Select each part of the bone setup one by one and bring down the 'Size' of 'Side Fins' to '14.0' feet in order to match the size of geometry. Readjust the positioning of the bones according to the geometry. Also rename the bones according to their position i.e. rename the bone for the side of the cardboard box as 'Side Bone' and the bones for the flaps of the cardboard box as 'Bottom_Flap_Bone' and 'Top_Flap_Bone' resp.
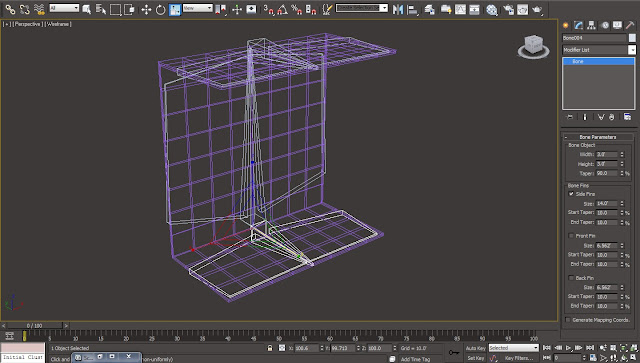
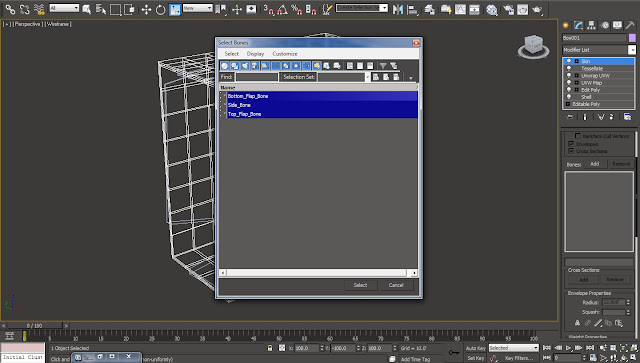
06 Now in order to skin the geometry to the bones apply a 'Skin Modifier' to the side of the cardboard box. Add all the three bones into the 'Bones' parameter of the 'Skin' parameter in order to link them to the geometry. Now depending on the default position of the envelops the geometry will move along with the movement of the bones.
07 'Envelopes' helps in defining an area of influence on a given geometry and can be found under the 'Skin Modifier' tools. So in order to make the movement of the geometry more accurate we have to adjust the 'Envelope' size from 'Radius' and 'Squash' parameters, available inside 'Envelope Properties'. The 'Inner Bound' of the envelope defines the strongest influence over the geometry whereas the part of the geometry under the 'Outer Bound' of the envelope is under a lesser influence of the envelope.
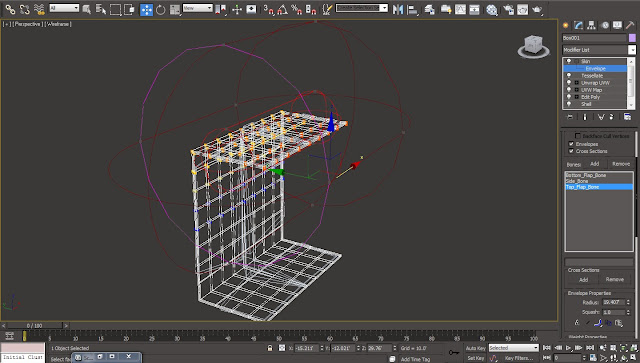
08 In order to make the flap geometry rotate as a separate rigid object which is not affecting other parts of the cardboard box we have to make the vertices of its envelope to be rigid. Enable the 'Vertices' option under the 'Select' parameters and select the vertices that we want to bring under the full influence of envelope. Also turn on the 'Rigid' option from the 'Weight Properties' and increase the value of 'Abs. Effect' to '1.0'. This will bring these vertices under the 100% influence of the bone.
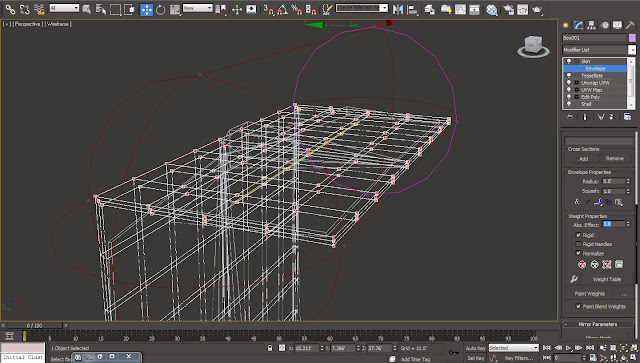
09 Now as we want the corner of the cardboard box to act as a break point between the side and the flap we have to add some more edges to the corner geometry of the cardboard box. Open up the 'Edit Poly' modifier tool stack and select the 'Edge' selection tool. Select the perpendicular edges to the corner edge and hit the 'Connect' tool from the 'Edit Poly' modifier parameters. Bring down the value inside 'Slide' parameter to '-75' in order to create a new loop of edges closer to the corner edge loop.
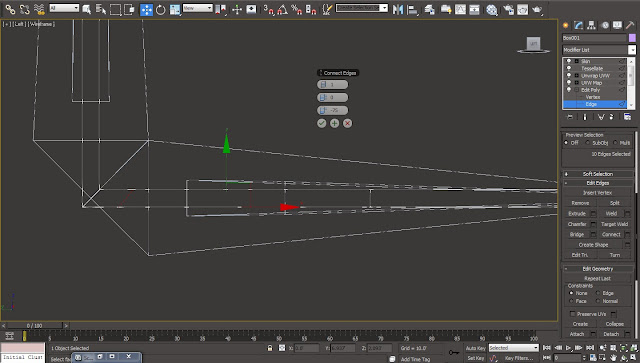
10 Repeat the step for the upper side of the corner edge loop. Straighten up the new edge loops by selecting them and bringing down the scale values through the scale tool. Once we are done adding up edges to the lower flap geometry we can repeat these steps to add the edges to the upper flap as well.
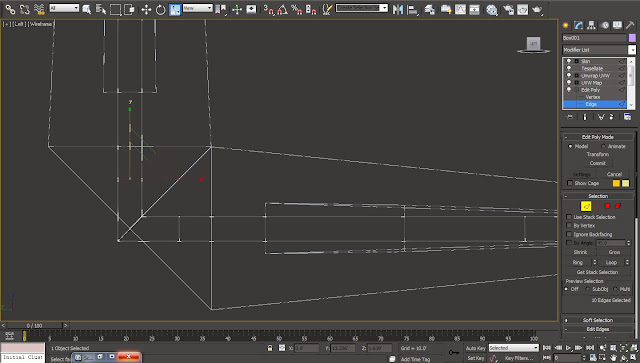
11 Switch back to the 'Skin Modifier' inside the modifier stack and select all the vertices of the envelope defining the Flap geometry except the corner vertices. Turn on the 'Rigid' option and change the value of 'Abs. Effect' to '1.0' once again. This will bring these vertices under the full influence f the bone.
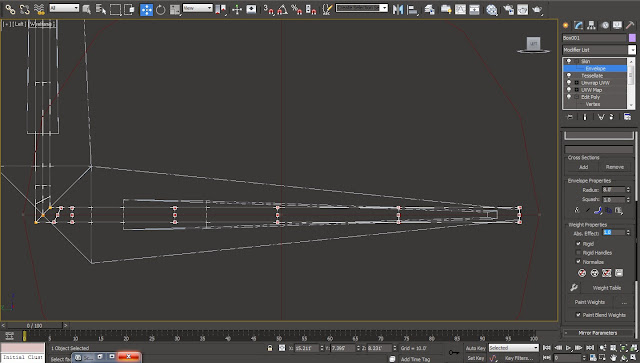
12 Similarly select the vertices defining the corner of the cardboard box and change the 'Abs. Effect' value to '0.5' while turning off the 'Rigid' option. Make sure that all the other vertices of the geometry are not under any influence of the current envelope.
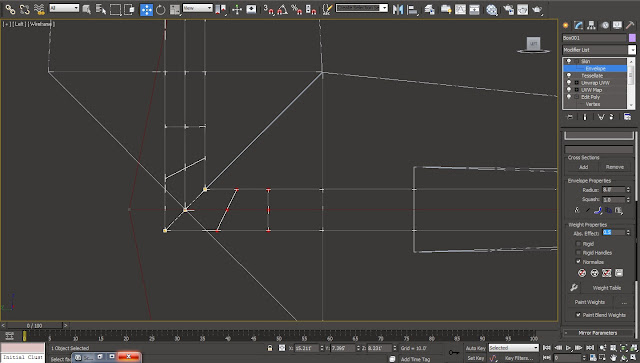
13 Now in order to start working on the envelopes of other parts of the geometry select the specific bone from the 'Bones' object list inside the 'Skin' parameters and bring the relevant vertices under the influence of their respective bones.
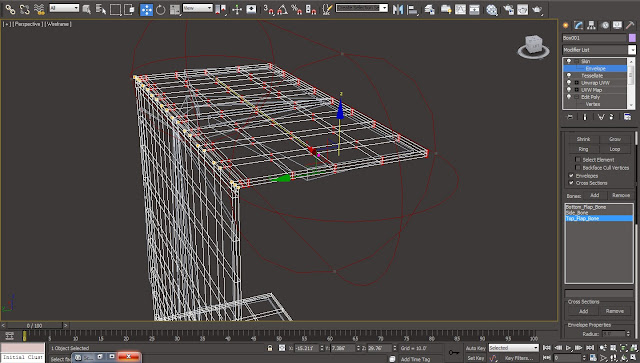
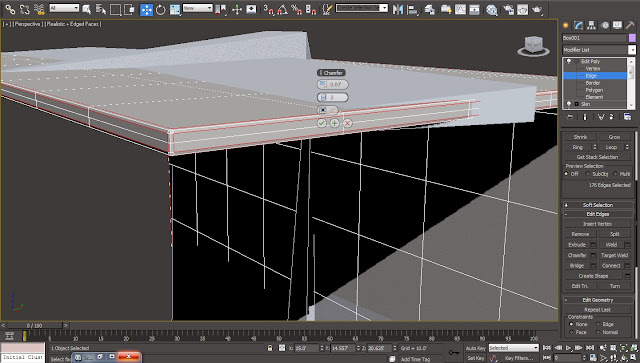
14 In the end we can bring back the smooth edges to the cardboard box side by adding up the 'Edit Poly' modifier back to the modifier stack. Select all the corner edges of the cardboard box and hit 'Chamfer' tool from the modifier parameters.
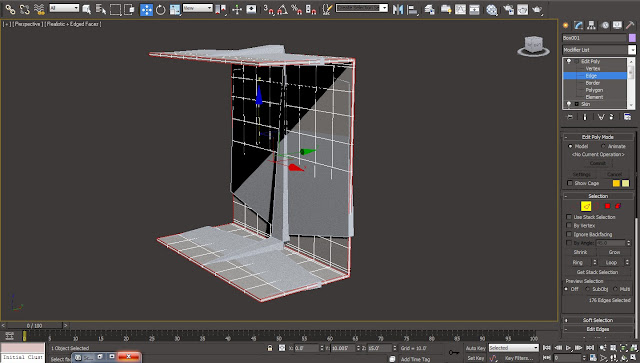
15 Bring up the 'Chamfer' amount only by '0.07' feet while increasing the number of segments to '2'. In the end add the 'Turbo Smooth' modifier to the geometry in order to get a smooth and more refined result of the cardboard box.
16 Now we are ready to complete the Cardboard Box by joining in the different sides of the box. Bring up he schematic view and link the 'Box 001' node to the 'Side Bone' node in order to make it the 'Side Bone' node the parent of all the bones and geometry itself. This will ease the complications of making the copies of the whole rig setup as the different parts of the cardboard box.


Hello
ReplyDeleteGood job
i want to learn rig cardboard box with video tutorial.
Are you have a video tutorial on youtube?